Contents
Cooling & component installation
If we remove the front plastic panel there are no cables hanging as they usually do. The front I/O panel is separated and mounted directly to the case skeleton, nice solution. You can also see that instead of the usual 5.25″ covers SM opted for these trays you can easily put smaller internal drives in. It has black brushed surface to match the brushed aluminium of the front panel.

The front grill can be removed from the case, and quite frankly, I see no reason why it is actually here. Unlike with the rear fan it has no reason to have it here, there is the front panel so it’s not like you can stick anything into the fans. There are all the fan screw holes in the case itself, this grill is put over them, and then the fan screws go through the grill. Complicated for no reason in my opinion.

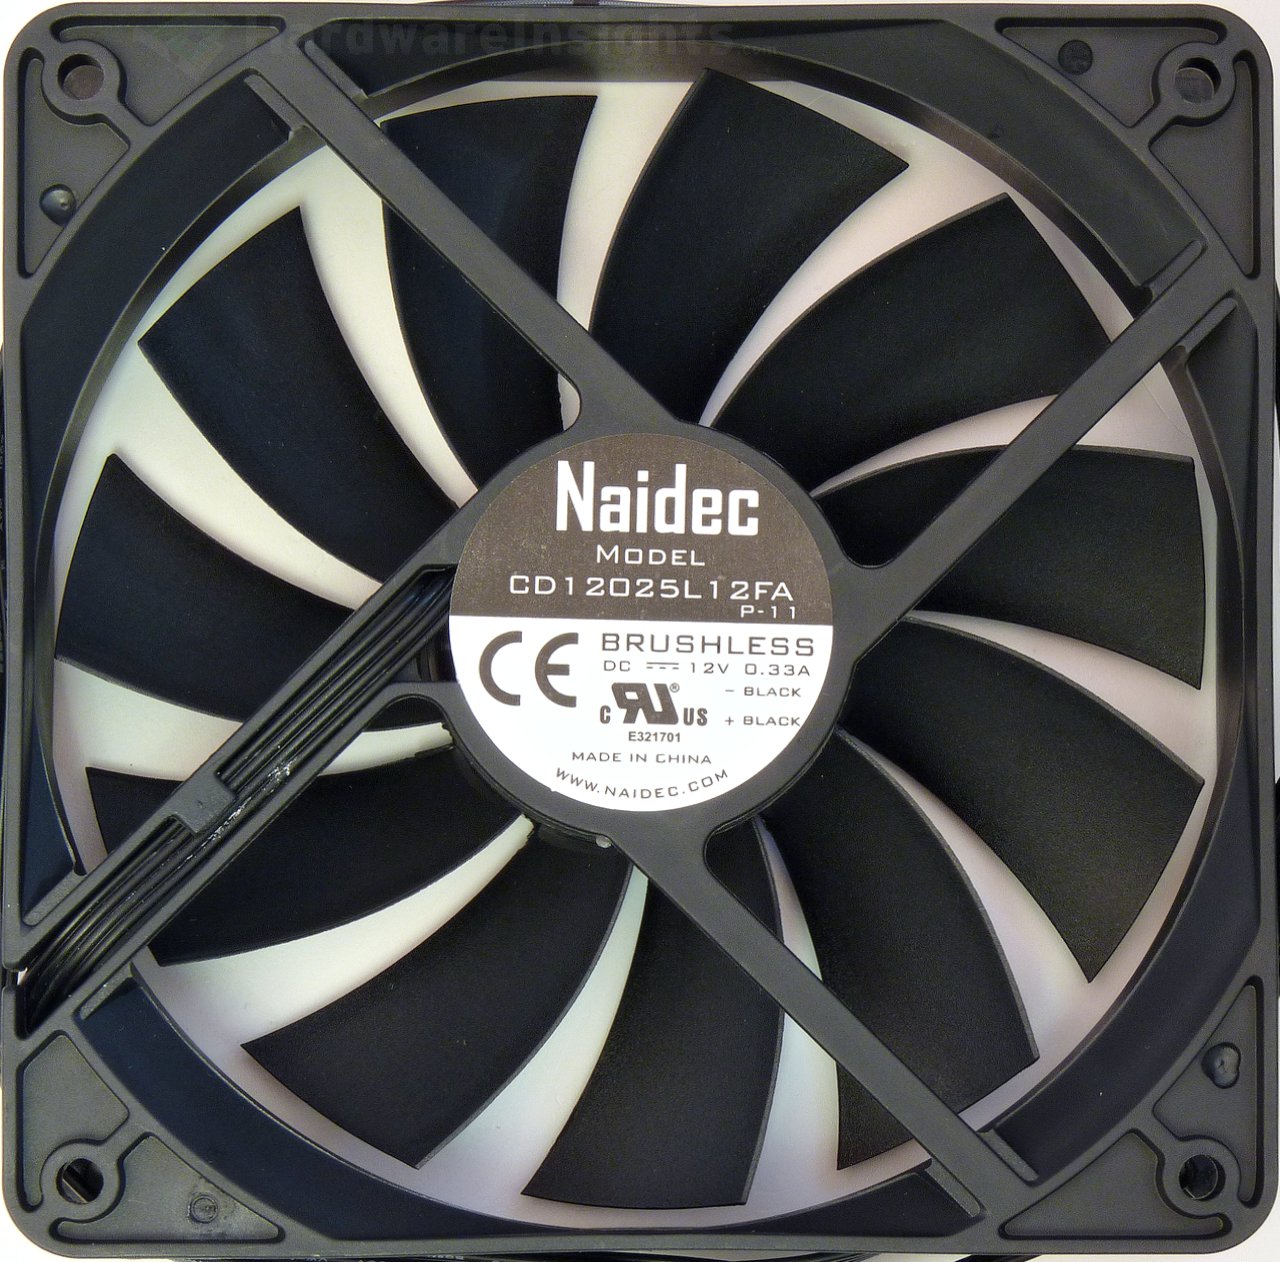
The 120mm fans which come with the case are Naidec CD12025L2FA. Funny things start right away, the company which we can see on its sticker is registered to Dongguan Haowei Electronic Co. Ltd. but most likely no website was ever running there. The DHE also has no public website. According to a spec which the distributor found and supplied the actual manufacturer is Dongguan Yijin Electronic Co. Ltd. It has some kind of sealed bearing, I would guesstimate some advanced sleeve/oil bearing, who knows. It is rated for 30000 hours at 40 °C with speed of 1200 RPM, airflow 50.4 CFM, 27.5 dBA of noise and 0.84 mm of water column maximum static pressure. All three come with 4-pin mini-DMI connector for optional PWM speed control.
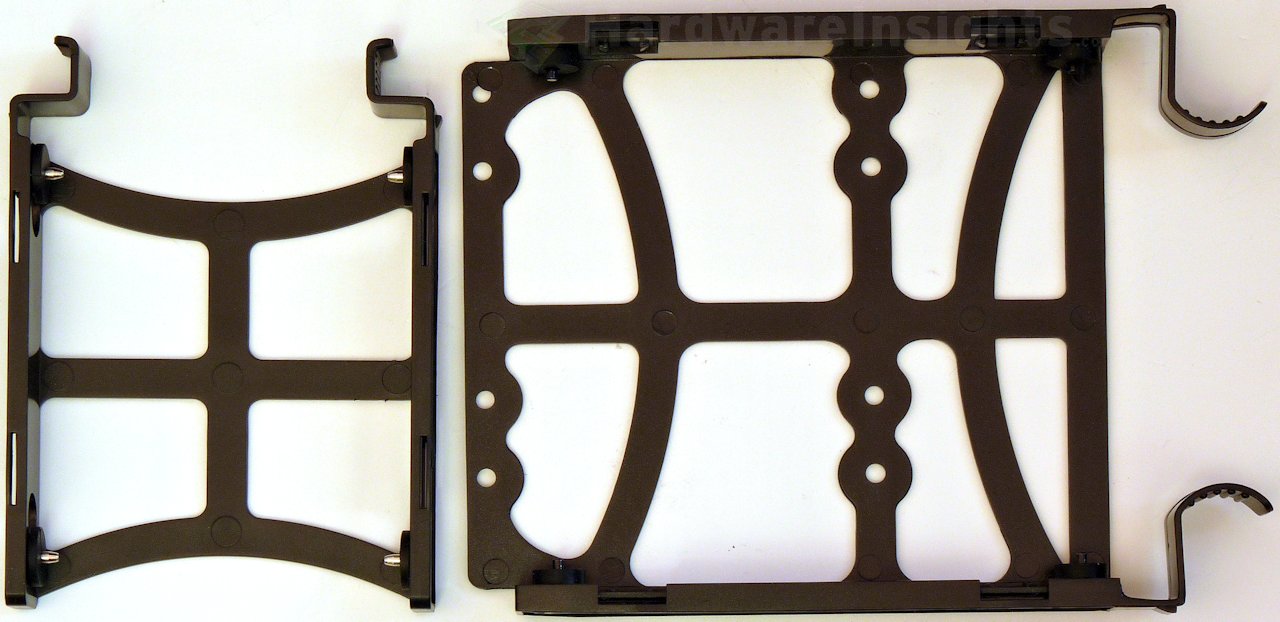
The 5.25″ caddies which come with the GS50-000R allow to install both 2.5″ and 3.5″ drives, this is a nice feature.

In the factory state the drive cages are all mounted together using two more screws. If you think the skelet/sides 0.6mm material is thin, then wait for this – the cages only use 0.5mm steel…
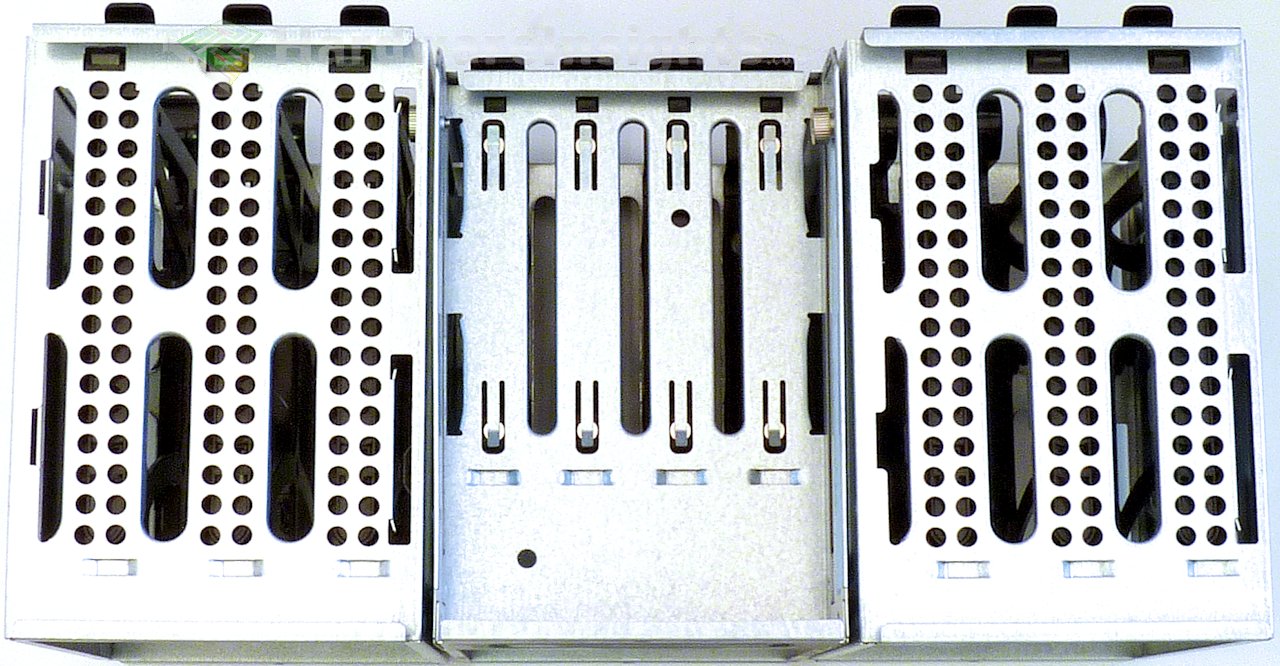
By reducing the width of the middle cage for only 2.5″ drives Supermicro created slightly larger space for long expansion cards in the case. You can also rearrange the cages, or remove some of them.

With the right size of drives, you can take advantage of tool-less installation. The 3.5″ caddies also support more firmly attaching the drives with screws, or using 2.5″ drives instead. There are rubber washers by the sides to dampen the vibrations a bit, but the caddies themselves are kinda loose in the cages. Also the cages are only screwed together on one side and then the thin steel…this does not feel like it won’t resonate with a few 15k enterprise hard drives.
Installing motherboard and larger card/heatsink combo was mostly without incidents. There is only really a very little space between the motherboard and power supply, especially with that metal spacer in there so you may have little troubles putting the board inside. Also forget about any larger card in the bottom MoBo slot, as usually. But what is missing here is added just over the board and also to right side where there is space enough for manipulation with cables and fans.
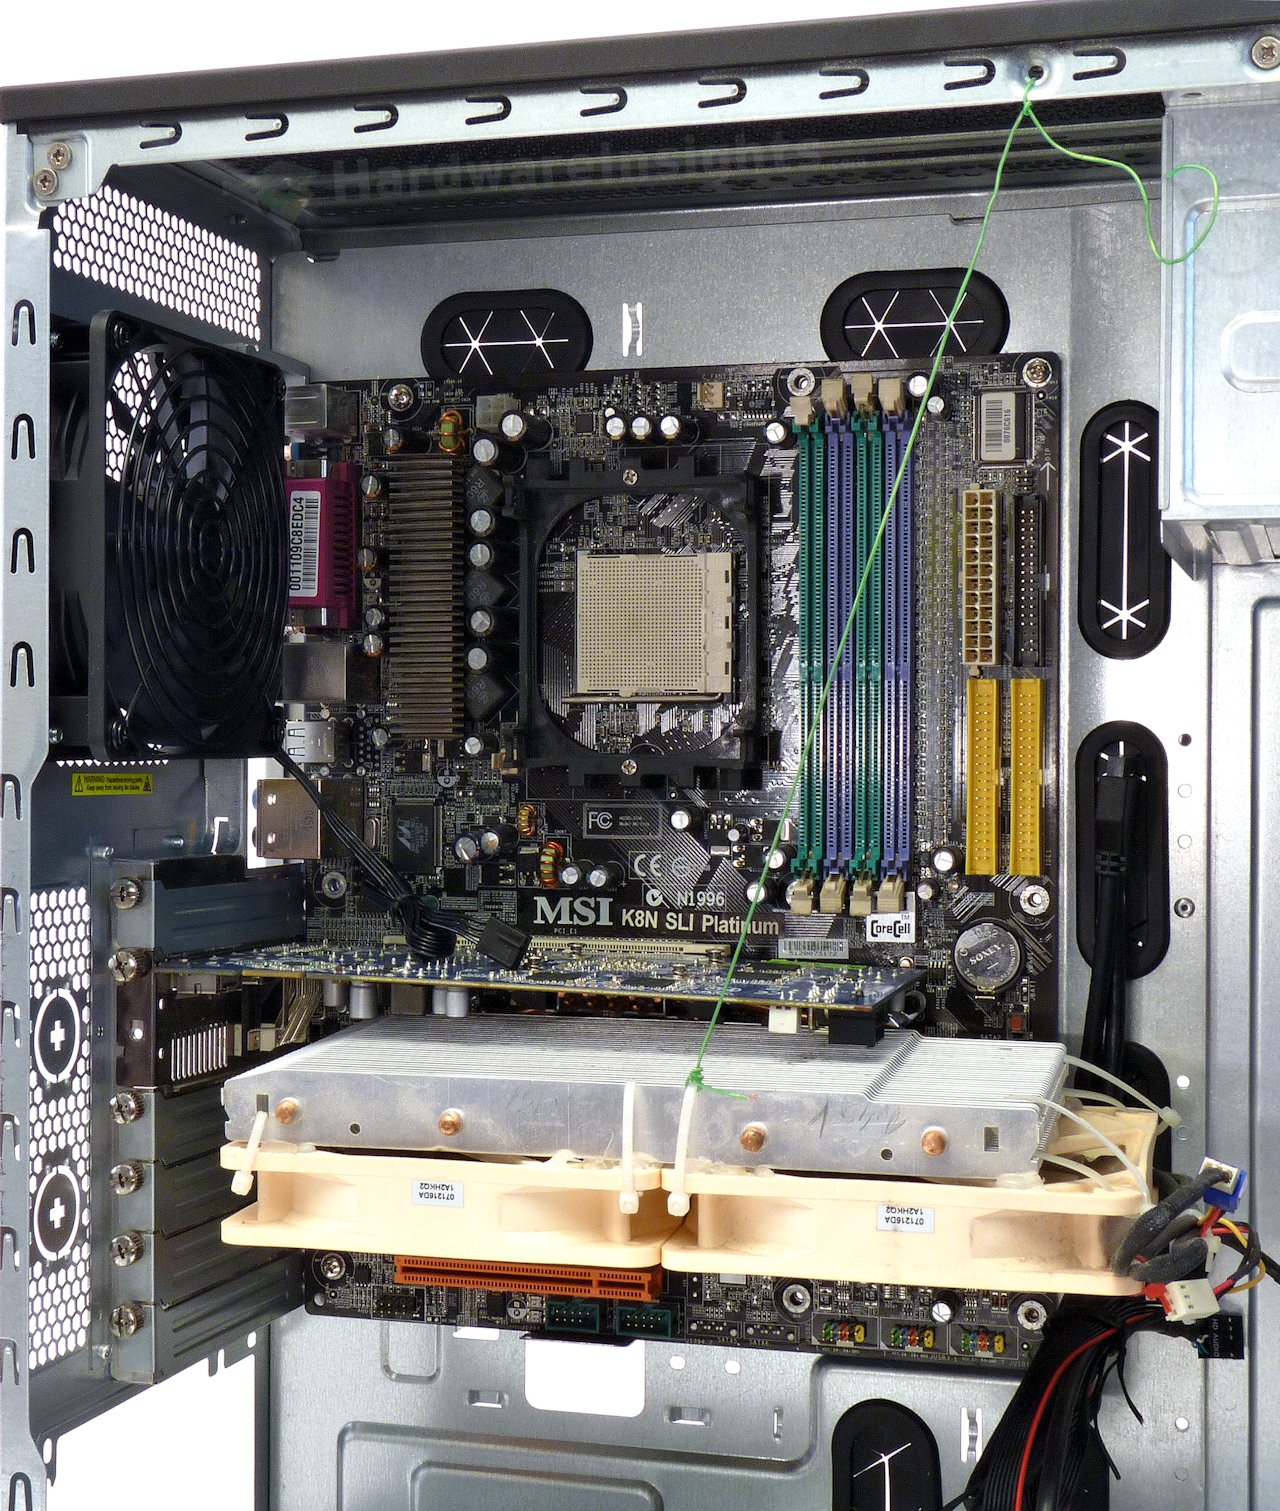
It also seems SM has some kind of universal skeleton for several models of cases. Notice the screw opening by the top where most likely different drive cages mount. I have used it to support the weight of the VGA/cooler here. It would explain some of the strange solutions and why there are independent parts riveted together. Almost like SM took some prefabricated chassis skeleton, added a few things and called it a new model. Well it kinda works, but as we can see it just does not reach the level of some competing solutions designed from the ground up directly to fit needs of their retail customers.