Contents
- 1Introduction
- 1.1Packaging and accessories
- 2Connectors & cabling
- 2.1Casing & cooling
- 3Input filtering
- 4Primary side
- 4.1+5 V stand-by rail
- 5Secondary side
- 5.1Build quality
- 6Load testing
- 6.1Loading +5 V SB
- 6.2Combined loading
- 6.3Combined loading ripple
- 6.4Crossloading, overloading and the Sweater contest
- 6.5Crossloading, overloading ripple
- 7Conclusion and evaluation
- 7.1Thanks
Load testing
Loading +5 V SB
As always, all load testing is done in accordance with testing methodology. The stand-by supply in Enermax Digifanless (EDF550AWN) had no problem providing both nominal power and extra power under (short) overload scenario. Efficiency almost reached 80 % under nominal load but dropped to 76 % under overload. But the Seasonic SS-520FL2 gained three extra points from me for 78.3 % efficiency/nominal load and 83 %/overload, I think it is fair to give the Digifanless two extra points especially when I now have more precise clamp meter and it may actually have a tiny bit better efficiency.
| Output (W) | Load (A) | Voltage (V)/ ripple (mV) | Input (W) | Efficiency/power factor |
| 0 | 0 | 5.08/1.60 | 0.5 | —/1 |
| 11.84 | 2.39 | 4.96/1.92 | 15.0 | 78.9 %/0.46 |
| 16.38 | 3.32 | 4.93/1.60 | 21.5 | 76.2 %/0.49 |
Ripple was great though, voltage started somewhat higher and dropped under nominal with load so the maximum difference was 1.6 %. It is tighter than the Seasonic so two points be it together with the efficiency.
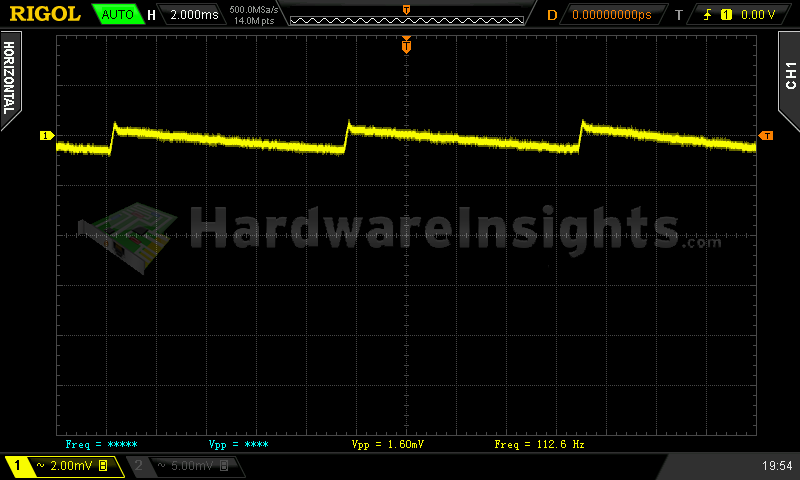
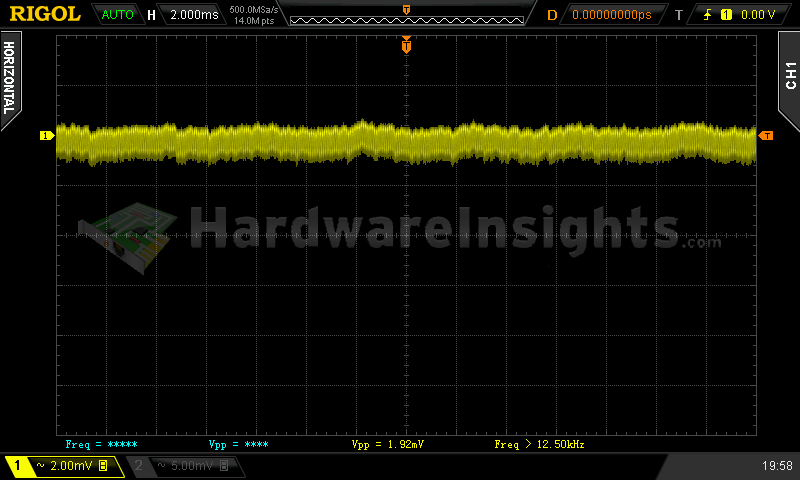
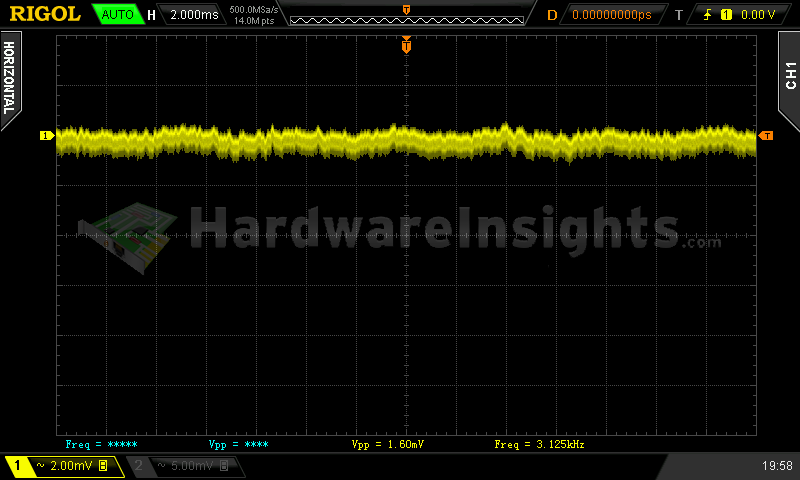
+5 V SB ripple (left to right): 0 A; 2.39 A; 3.32 A
Combined loading
Combined loading also went without incidents. It seems that Anpec DC-DC buck drivers are a curse as it is like Seasonic G/S12G family, voltage is quite high both on +3.3 and +5 V with the first one being over 2.4 % above the nominal. Digifanless is going to unnecessarily lose points here. The stand-by supply could use a boost on the other hand with the voltage dropping to 4.91 V under 100 % load. What I like though is the voltage regulation on +12 and −12 V. Both stayed within 0.5 %, I think it deserves an extra point.
| Output power | Load/ voltage +5 V SB | Load/ voltage +3.3 V | Load/ voltage +5 V | Load/ voltage +12 V | Load/ voltage −12 V | Input power | Efficiency/power factor | Temperature intake/ outtake |
| 5.4%/ 29.63 W | 0 A/ 5.04 V | 0 A/ 3.38 V | 0.424 A/ 5.07 V | 1.878 A/ 12.03 V | 0.407 A/ −12.01 V | 38.0 W | 78.0 %/ 0.77 | 25 °C/ 26 °C |
| 20 %/ 113.85 W | 0.491 A/ 5.02 V | 2.95 A/ 3.38 V | 2.31 A/ 5.07 V | 7.04 A/ 12.05 V | 0.405 A/ −12.02 V | 125.5 W | 90.7 %/ 0.92 | 26 °C/ 27 °C |
| 40 %/ 217.10 W | 0.97 A/ 4.99 V | 4.36 A/ 3.38 V | 3.44 A/ 5.07 V | 14.55 A/ 12.04 V | 0.408 A/ −12.03 V | 232.5 W | 93.4 %/ 0.95 | 27°C/ 28 °C |
| 60 %/ 328.19 W | 1.44 A/ 4.97 V | 5.29 A/ 3.37 V | 4.99 A/ 5.06 V | 22.7 A/ 12.03 V | 0.406 A/ −12.03 V | 350.5 W | 93.6 %/ 0.98 | 27 °C/ 29 °C |
|
80 %/ 451.60 W |
1.91 A/ 4.94 V | 6.15 A/ 3.37 V | 6.18 A/ 5.06 V | 32.0 A/ 12.04 V | 0.406 A/ −12.05 V | 484.5 W | 93.2 %/ 0.98 | 28 °C/ 32 °C |
| 100 %/ 552.04 W | 2.35 A/ 4.91 V | 6.71 A/ 3.36 V | 8.05 A/ 5.06 V | 39.3 A/ 12.02 V | 0.401 A/ −12.05 V | 597.5 W | 92.4 %/ 0.99 | 30 °C/ 34 °C |
Efficiency was not even 80 % with initial load of less than 30W but quickly climbed to 90 % and stayed around 93 % for the rest of the loading. As it is passive unit, it was completely silent. It was mostly cooled by air leaving the loader thanks to its high power fans. The air coming from the unit itself was always only few degrees warmer as it uses the whole casing as a heatsink. By the end it was quite warm especially around the modular board which cools DC-DC modules. In a computer case there will be no redundant air blowing towards the unit, on the other hand the case itself may work as a big heatsink, especially if you add some silicone pads beneath to help the transfer.
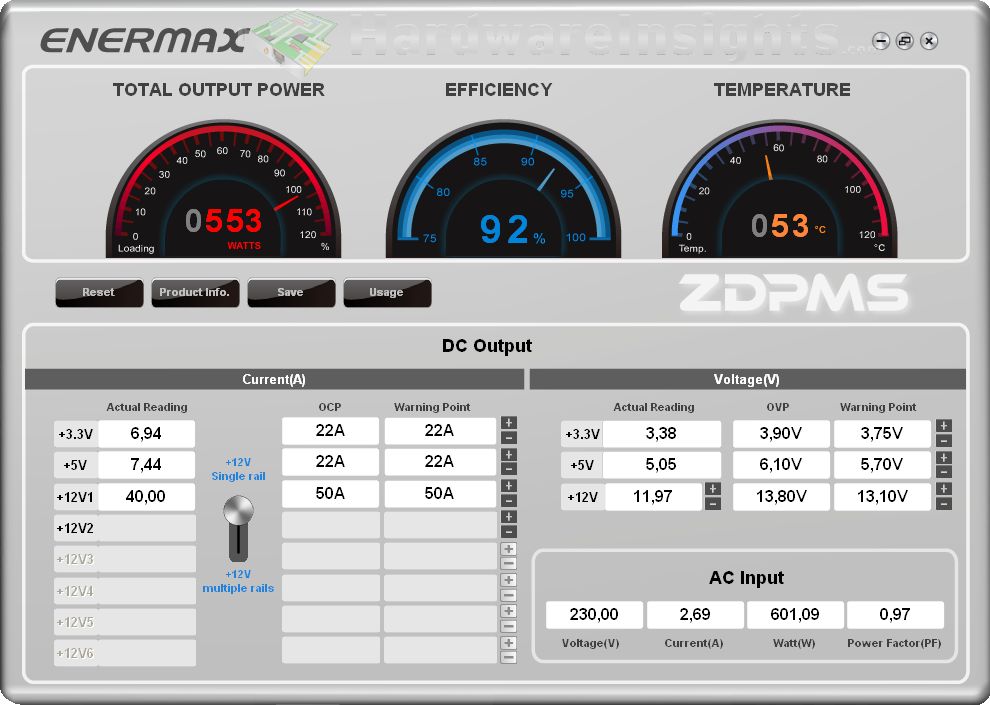
To test the ZDPMS I had to make myself an ugly adapter as the provided cable was too short to connect the supply from its testing place to my computer, but it worked. I am somewhat disappointed that you can only tweak the +12 V rail voltage (in 0.05-0.1 V steps, that is too high anyway) and there is NO setting for any OCP! You can only set up warning points when the program starts alerting, that’s all. And it can definitely use tweaking for the +3.3/+5 V voltage. Another flaw, it does not measure the stand-by supply at all which creates up to like 10 W difference initially. With no load, it reads 0 A output but 4 watts and 45 % efficiency, what? As the load increases, it gets closer to real number so overall I can say it is pretty much accurate for the task. Also the temperature meter is quite precise too. So we have efficiency, power, temperature and +12 V voltage/rail control. I think that five points are fair for this, it is a good start.
Combined loading ripple
Ripple results are great, well, apart from the −12 V rail. As it only has 200 μF of capacitance, it was not really able to keep with the fan connected. Having 220- or 330μF caps, it would be much better. The +12 V rail later climbed to somewhat over 30 mV but that is still about 30 % of the ATX specification. Lower voltages stayed around 10 mV. For the −12 V rail the unit is going to lose some points but not too many as I have lowered the requirements for −12 V which is hardly used these days.
| Output % | Ripple +5 V SB | Ripple +3.3 V | Ripple +5 V | Ripple +12 V | Ripple −12 V |
| 5.4 | 6.60 mV | 9.00 mV | 6.40 mV | 17.2 mV | 41.6 mV |
| 20 | 8.60 mV | 7.00 mV | 8.40 mV | 29.6 mV | 53.6 mV |
| 40 | 9.40 mV | 8.8 mV | 8.60 mV | 28.4 mV | 50.4 mV |
| 60 | 12.0 mV | 11.4 mV | 11.6 mV | 34.4 mV | 47.2 mV |
| 80 | 11.6 mV | 12.4 mV | 10.8 mV | 37.2 mV | 50.4 mV |
| 100 | 11.0 mV | 8.20 mV | 8.80 mV | 33.6 mV | 46.4 mV |

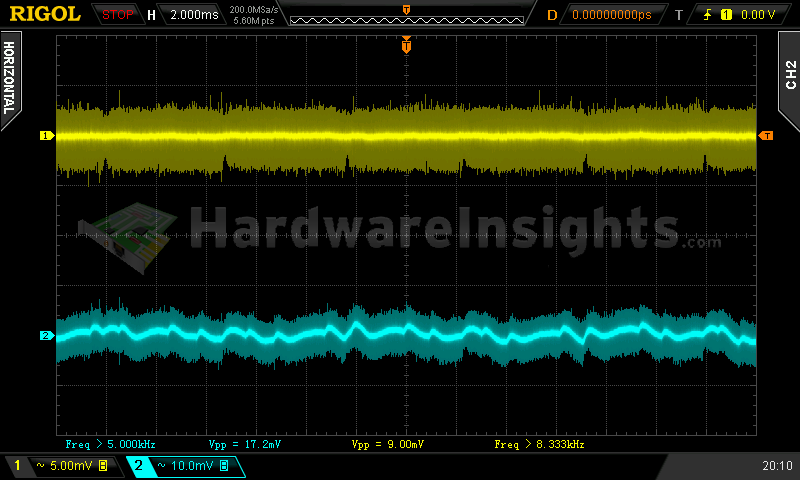
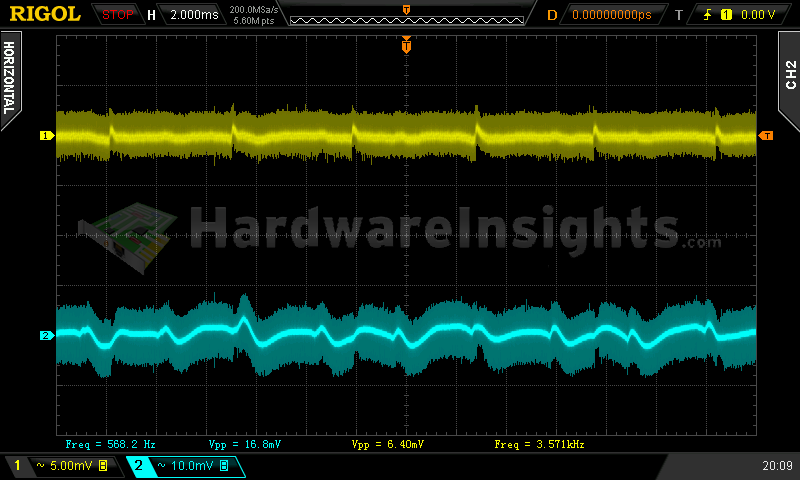
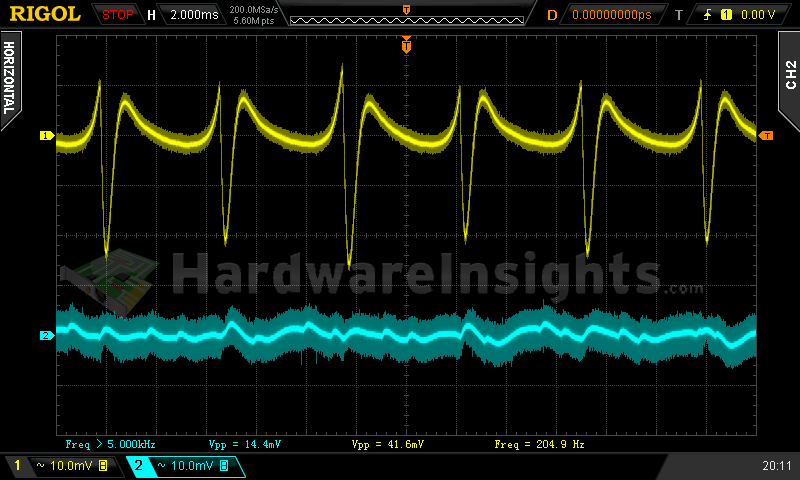
Ripple 5.4% load (left to right): +5 V SB; +3.3 V; +5 V; −12 V. The second channel is connected to +12 V.
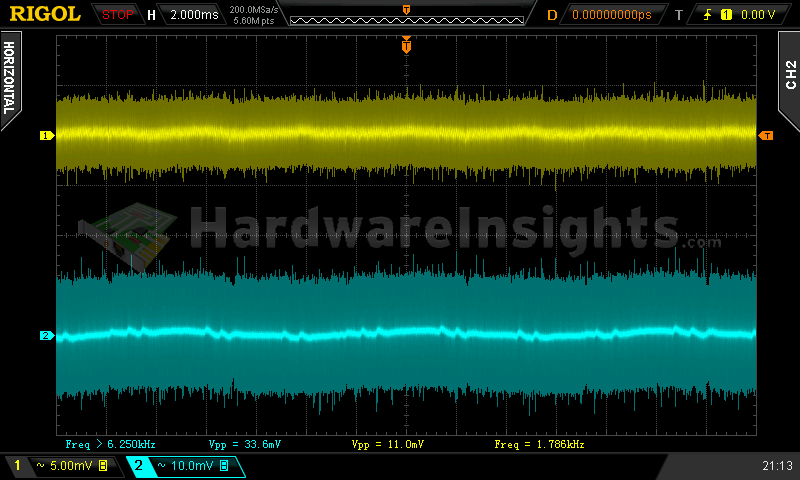

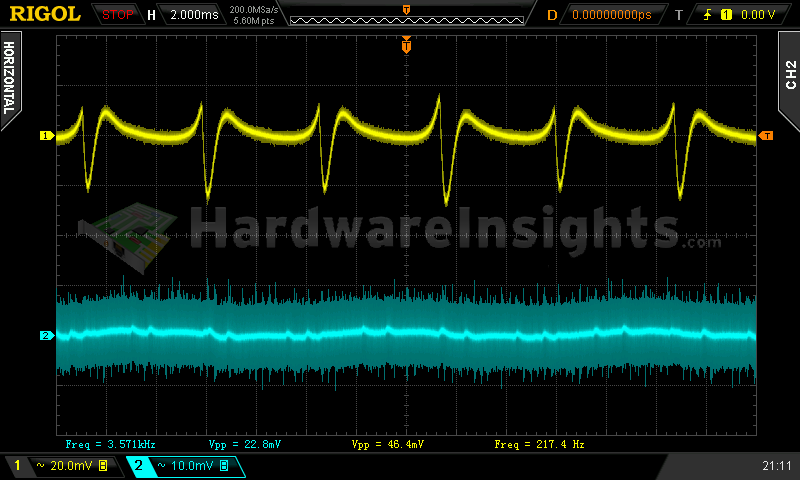
Ripple 100% load (left to right): +5 V SB; +3.3 V; +5 V; −12 V. The second channel is connected to +12 V and the +5 V image is taken later under OTP testing (@65 °C).
Crossloading, overloading and the Sweater contest
Crossloading went quite well, considering this is +12V unit with DC-DC modules, I did not expect anything else. Voltage regulation on ±12 V rails was good once again, I give half an extra point. On the other hand, +3.3 and +5 V rails were ever so slightly higher than under combined load so here the Digifanless is going to lose again as it is now even 2.7 % from nominal value. That could definitely be better, for high-end unit especially so expensive I expect 2 % maximum.
| Output power | Load/ voltage +5 V SB | Load/ voltage +3.3 V | Load/ voltage +5 V | Load/ voltage +12 V | Load/ voltage −12 V | Input power | Efficiency/power factor | Temperature intake/ outtake |
| 24 %/ 131.44 W | 0.493 A/ 5.01 V | 1.497 A/ 3.38 V | 19.06 A/ 5.08 V | 1.844 A/ 12.06 V | 0.402 A/ −12.05 V | 149.0 W | 88.2 %/ 0.92 | 27 °C/ 33 °C |
| 17 %/ 96.56 W | 0.493 A/ 5.02 V | 19.15 A/ 3.39 V | 0.402 A/ 5.08 V | 1.838 A/ 12.06 V | 0.412 A/ −12.03 V | 113.5 W | 85.1 %/ 0.90 | 26 °C/ 31 °C |
| 98 %/ 539.79 W | 0.494 A/ 4.98 V | 1.521 A/ 3.37 V | 1.590 A/ 5.06 V | 43.1 A/ 12.05 V | 0.398 A/ −12.06 V | 580.0 W | 93.1 %/ 0.98 | 29 °C/ 33 °C |
| 142 %/ 780.47 W | 2.87A/ 4.86 V | 21.36 A/ 3.36 V | 21.06 A/ 5.05 V | 48.5 A/ 12.03 V | 0.409 A/ −12.09 V | 871.0 W | 89.6 %/ 0.99 | 30 °C/ 40 °C |
Combined overloading finally went smoothly, though the OCP on +12 V in the single rail configuration acted slightly before 50 A when it should. I basically did not even trigger the OPP as I loaded all rails to their maximum, adding more anywhere triggered their over current protection. So the maximum is almost 800 W or more than 140 % of nominal power. I think that is good, but the efficiency dropped under 90 % so only two extra points. Testing overheating and overtemperature protection with a few pieces of some foam and papers to block the airflow and exhaust was futile (not only for this passive unit but also for other units with fan) so I came up with the Sweater contest to test OTP.
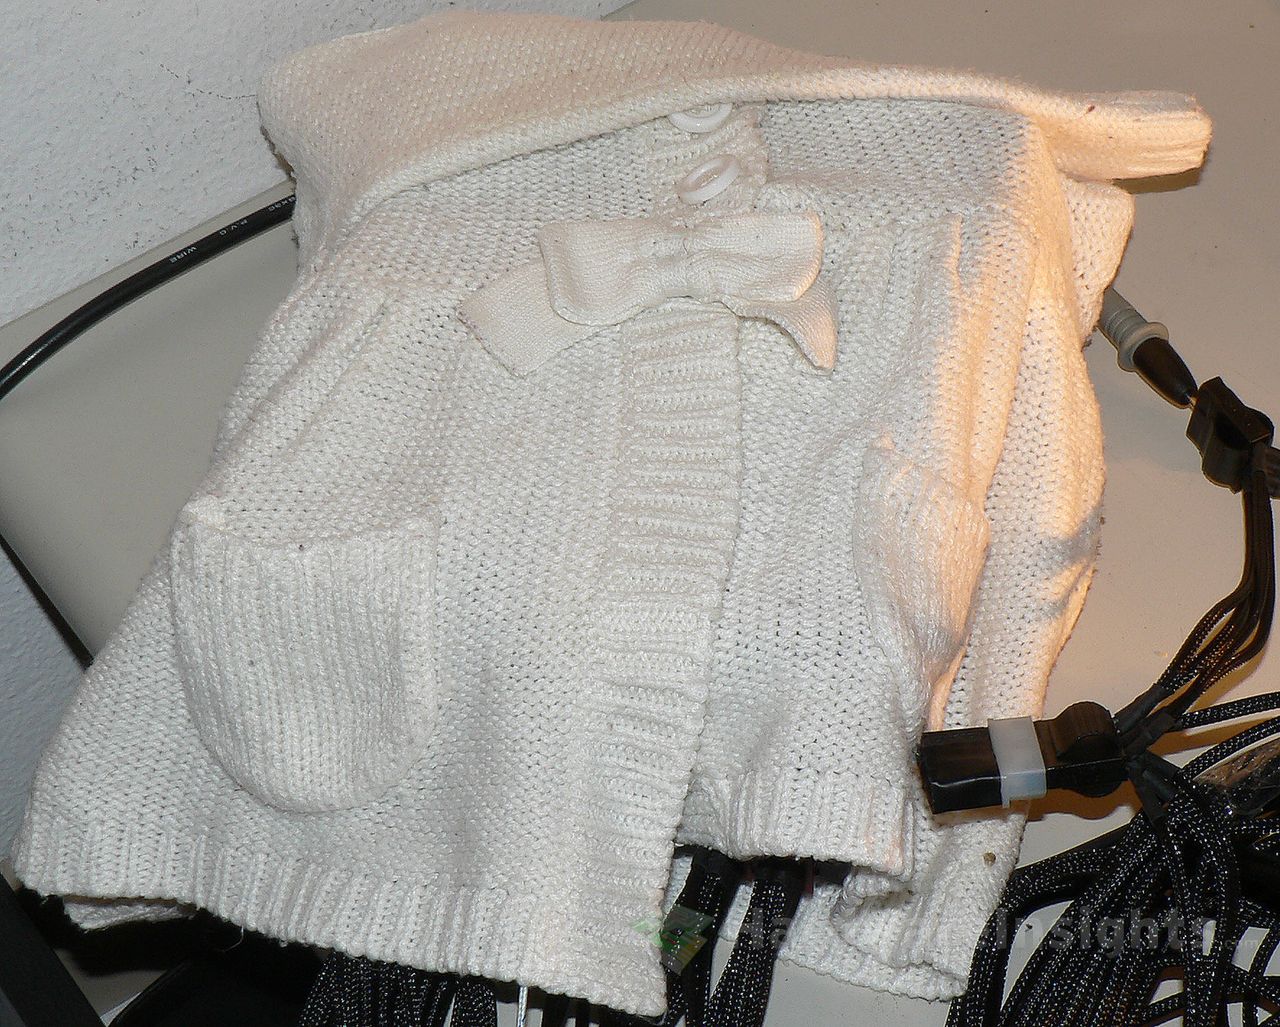
I have actually tried something similar with the Seasonic Platinum Fanless 520 W which handled about 30 minutes of full load in old child sweat shirt. This time I acquired child sweater and I am going to keep it for the new Sweater contest! So, I gave up after more than hour when the temperature barely reached 90 °C and nothing was happening. Clearly the Digifanless unit has definitely beaten both the Seasonic (while providing 30 watts more!) and the sweater too! I had to add some extra foam around and carton box on the top so it finally shut down not sooner than ten minutes later with 93 °C! I think that with some heat conducting silicone pads and at least some minimum airflow from for example CPU cooler, you may even dare to mount this wonder on the top of your old case as this is going to handle that. I think it is worth the extra bonus of whole ten points!
Crossloading, overloading ripple
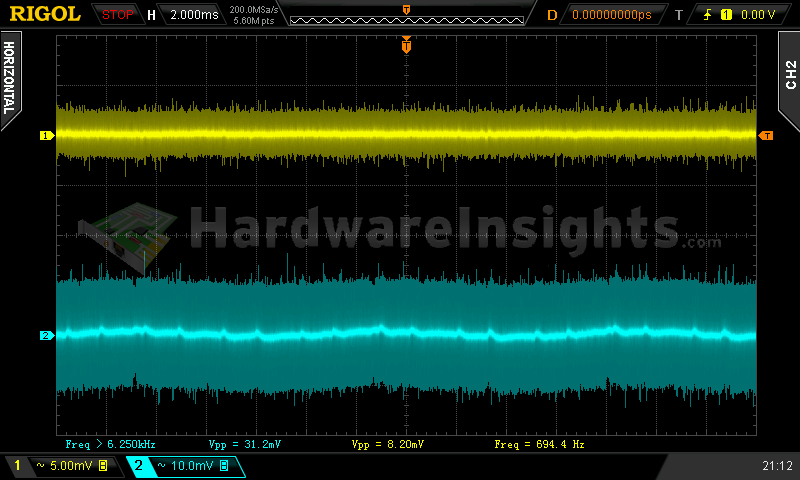
Once again the −12 V ripple was the highest. Under combined overload, the +12 V rail ripple increased over 40 mV but mostly stayed there as I increased the load even more.
| Output % | Ripple +5 V SB | Ripple +3.3 V | Ripple +5 V | Ripple +12 V | Ripple −12 V |
| 24 | 12.0 mV | 13.6 mV | 11.2 mV | 28.0 mV | 51.2 mV |
| 17 | 8.20 mV | 7.40 mV | 6.60 mV | 20.0 mV | 45.4 mV |
| 98 | 16.2 mV | 9.60 mV | 7.80 mV | 28.4 mV | 46.4 mV |
| 142 | — | — | 10.4 mV | 41.8 mV | — |